Measuring Guide

How to measure your space to find the perfect fit
Have you ever thought what comes first – do I buy a bunch of organizational bins and hope for the best or do I measure and try to figure out what works? Ok, so let’s take the second route. You measure your cabinets and get around 24” in depth (standard cabinet depth) and then have varying widths. Now what? The first approach, you buy a bunch of bins and pray that they fit? Only to be frustrated and have bins that don’t match and are all different sizes.
Take a deep breath. You got this – with a little help from mDesign.
Want to organize like the pros? We have their secrets and are going to spill the beans!
First, measure. I know you are excited and want to buy, buy, buy, but trust us. What’s the saying – measure twice, cut once? It will save you a lot of frustration if you measure your spaces and then buy.
Second, think of what kind of organizational bin/box you want to have that fits into the look. Let’s take your kitchen. There are bamboo bins, clear bins, wire bins, woven bins, and paperboard bins. The best part? You can mix and match a few looks and it won’t look like you just threw some things together. Our experts tell us not to go over 3 different styles of bins to ensure a cohesive look.
Third, plan. plan. plan. Now that you have your measurements and the style you want – putting it together is the fun part. Most standard cabinets are 24” deep and vary in its width. Think about what is going in this cabinet. Is it a pantry? Will you have a lot of bulky items that need contained? Do you have a built-in Lazy Susan that is unruly? We have bins for that. Now, I could go into each example in detail, but for argument’s sake, let’s take a pantry.
Here are step-by-step instructions to help you so you don’t feel lost.
1 Organize each shelf for a purpose. What do you use most often? Those should be accessible. Things you might not do every day, baking for instance, should go on the higher spots. Do you have kids? Maybe the lower shelf should be a snack center to help kids pick out their own food. For our example here is how I laid out the pantry. This pantry has 2 sections. A top 3-shelf and a bottom 4-shelf roll out style.
- Top Shelf – Bulk/extras. This for the extra flour, big bulk items from Costco, and anything I would use to refill my smaller containers.
- 2nd Shelf from Top – I am on the short side, so this is still a little tall for me, but for my husband, this is where he keeps his snacks. He is a snacker (don’t judge) so we have cookies, chips, pop-tarts, and anything a 3rd grader might like on this shelf.
- 3rd Shelf from Top – These are my items I use almost every day. Cereal, bags of chips, rice packets, peanut butter, jelly and other things that I use more often.
- 1st Roll Out Shelf – My main supplies for making my smoothies. I have small packets of matcha, chia seeds, protein powder, various nuts, dressings, etc. I also have some pasta on this shelf because it fit. We don’t use pasta every day, but I usually keep serval boxes on hand.
- 2nd Roll Out Shelf – This is my main baking supplies. I bake a lot, so I keep a small airtight container of flour, sugar, brown sugar, baking lard, pumpkin cans, etc.
- 3rd Roll Out Shelf – Here are all my canned goods. I have veggies, soups, broth, all sorts of canned items all organized and separated for anything.
- 4th and Bottom Roll Out Shelf – Here is my kids snack corner. Small bags of chips, crackers, gummies, extra apple sauce, mac-n-cheese, etc. This way my little one can just grab what she wants and feel empowered to get it herself.
What’s the secret to a beautiful pantry? Empty all the store boxes and fill each organizational bin with its contents. It looks much cleaner!
2 Now, that you know what you are planning on putting on each shelf, it is time to buy your bins.
- In our example, I used wire bins and clear plastic bins. For the top part – 2 shelves, I used several large, deep bins. I got some that were 12” long x 9” and could fit 1 depth-wise for my bulky items and since my cabinets are only 24” wide I could fit 2 across. For a total of 4 bins.
- I used several smaller bins for the 3rd shelf, since my items are more compact, and I also got several bins with divided sections to help keep me more organized.
- For the bottom 4 shelves, I used several 16” x 4” x 3.5” bins. These are amazing little bins. I use them for cans, baking, nuts, peanut butter, all my smaller jars fit into them perfectly. These also work well for my daughter’s snacks.
- Once you have purchased your bins, now comes the declutter and reorganizing part. Take everything out, clean the shelves and start to assemble your new pantry! Don’t fret if your first layout doesn’t work and you need to reorganize. I had to do this over several days until it was right for our family.
3 Once you have purchased your bins, now comes the declutter and reorganizing part. Take everything out, clean the shelves and start to assemble your new pantry! Don’t fret if your first layout doesn’t work and you need to reorganize. I had to do this over several days until it was right for our family.
There you have it!
That's the secret to measuring, buying, and organizing your cabinets. You're now ready to tackle each room!


We would love to see what you did! Send us some before and after photos and we will share them on our social channels. Be sure to tag us! @mdesign

Check out our full Spring Cleaning blog series for more inspiration.

Laura Sirk is a Marketing Manager at mDesign
and loves all things organization and cats. I’m one cat away from being a cat lady. MEOW!
How do you stay organized? We’d love to hear your story!
There are many ways that you can contribute and be part of our family.
Add your social media photos to our website and more! Visit mdesignhomedecor.com and learn how you can help spread the word. Get 10% off your first order when you subscribe to our email list. Plus, follow us on social media.
|
|
|
|
|


Posted: Mar 11, 2020
Related Blog Posts
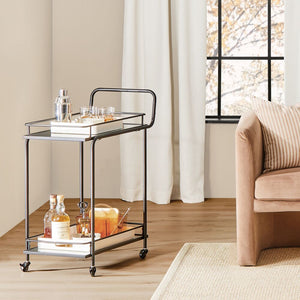
Update your style with these fun rolling cart ideas. The possibilities are endless. While there are millions of things you...
Read More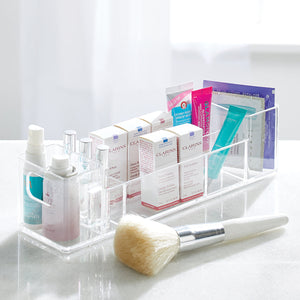
Don’t fall victim to beauty-product clutter. Sort your beauty samples like a pro with an editor-approved makeup organizer that gives...
Read MoreUpdate your style with these fun rolling cart ideas. The possibilities are endless. While there are millions of things you...
Read MoreUpdate your style with these fun rolling cart ideas. The possibilities are endless. While there are millions of things you...
Read More